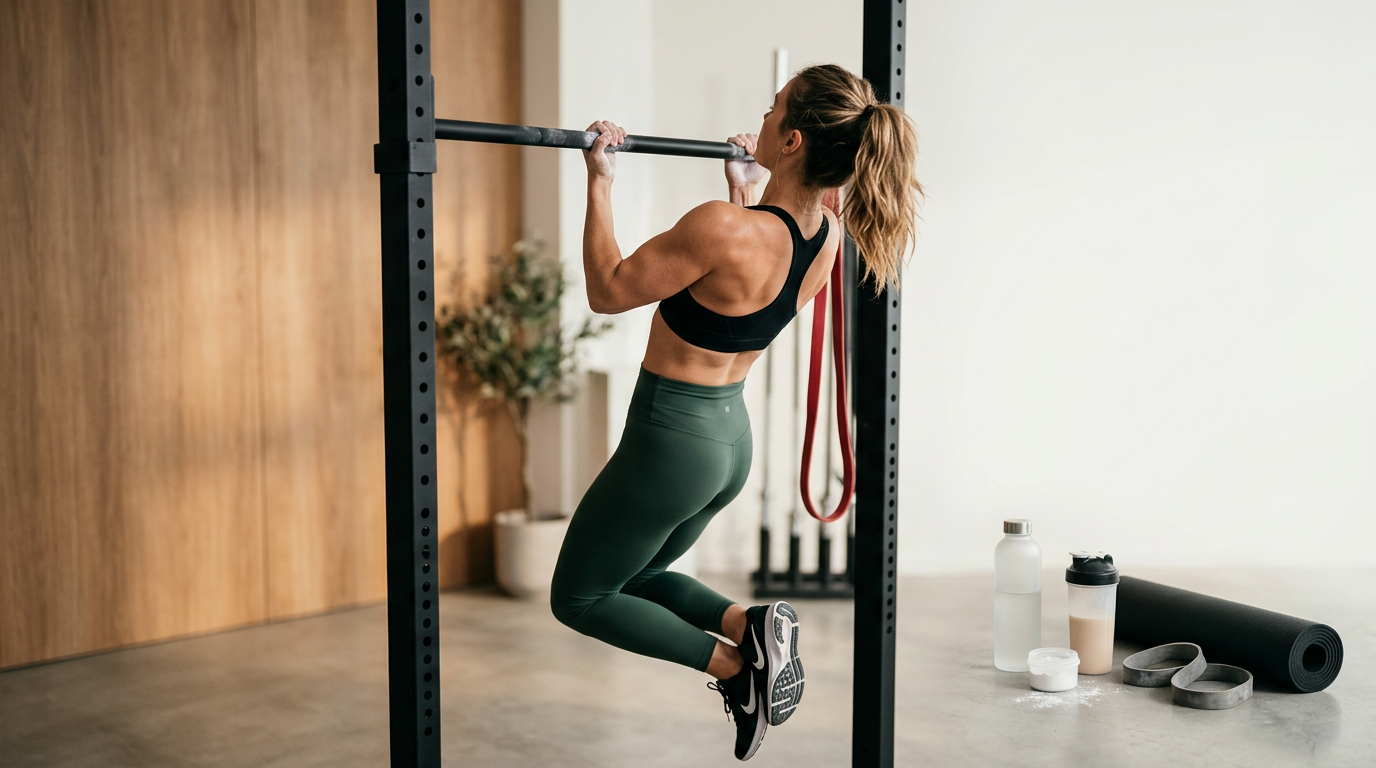
Pull-ups & Chin-ups — 0 to 10 repetitions

negatives, band-assisted, scapular pull-ups, grip width differences
This guide presents a proven progression system for pull-ups that will take you from zero to ten clean reps through specific exercises, techniques, and programming schemes.
📌 3 Key Takeaways
- The path to your first pull-up starts not with pulling, but with controlled lowering (negative reps) and scapular activation (scapular pull-ups), which build foundational strength and control.
- Use assisted variations like bands and the lat pulldown machine strategically to build volume and improve technique, rather than relying on them as your primary movement.
- Consistency is more important than intensity; train pull-ups 2-3 times per week with varying goals (strength, volume, technique) and be patient, as progress is not linear.
Why are Pull-ups the Gold Standard for Upper Body Strength?
💬 Simply put: Pull-ups are a compound exercise that builds upper body strength by making various muscles work together to lift your body weight.
A pull-up is much more than just a back exercise. It's a comprehensive test of relative strength – your ability to move your own body through space. Unlike isolating movements on machines like the lat pulldown, a pull-up requires coordinated work from dozens of muscles. The primary movers are the latissimus dorsi (lats) and biceps, but the rhomboids, trapezius, rear deltoids, and forearm muscles (for grip) are also actively involved, while your entire core and glutes work as stabilizers to prevent unwanted swinging.
In my practice as a coach, a client's ability to perform a few clean pull-ups is a clear indicator of good functional strength. I often see men who can pull 100kg on a lat pulldown machine but can't do a single clean bodyweight pull-up at 85kg. This discrepancy highlights a lack of neuromuscular coordination and stabilizing strength, which are developed precisely through bodyweight exercises. The pull-up doesn't just build muscle; it teaches you how to use your body as a cohesive unit, a transferable skill to any other athletic endeavor.
Let's be clear – pull-ups are hard. They require a high strength-to-bodyweight ratio. That's precisely why achieving them is so satisfying. Every rep is a victory. This guide is designed to give you a clear and structured path to that victory, broken down into achievable phases.
Phase 1: The Foundation — Before Your First Pull-up (Weeks 1-4)
Before you even attempt a pull-up, you need to build a solid foundation. Attempting pull-ups without preparatory strength only leads to frustration and poor technique. For the first 3-4 weeks, focus entirely on the following three exercises, performed twice a week.
1. Active Hang (Dead Hang): This is the most fundamental exercise for grip strength and shoulder health. Grab the bar with an overhand grip, slightly wider than shoulder-width. Relax completely, but keep your shoulders active – imagine trying to pull them "down and back," away from your ears. Your goal is to accumulate total time under tension. Start with 3 sets to failure, aiming within a few weeks to reach 3 sets of 30-45 seconds with 90 seconds rest between them. This will prepare your forearms and decompress your spine.
2. Scapular Pull-ups: This is the key to initiating the movement correctly. From an active hang position, without bending your elbows, try to pull your shoulder blades down and towards each other. Your body will lift a few inches. Hold at the top position for a second and return in a controlled manner to the starting position. The movement is small but incredibly important. Perform 3 sets of 8-12 reps. I often see people bending their elbows – this is a mistake. Think only about moving your shoulder blades.
3. Inverted Rows (Bent-over Rows): A pull-up is a vertical pull. To assist it, we need a strong horizontal pull. Find a barbell on a Smith machine or squat rack and set it at about waist height. Lie underneath it, grab it with hands slightly wider than shoulder-width, and with your body straight (tight core and glutes), pull yourself up until your chest touches the bar. Lower yourself in a controlled manner. The more horizontal your body, the harder the exercise. Start with 3 sets of 10-15 reps at an angle that allows for clean form.
Phase 2: The Path to Your First Clean Rep — Negative Pull-ups
After building the foundation, it's time to introduce your body to the full range of motion of the pull-up. The most effective way to do this is through the eccentric (negative) portion of the rep. Our muscles are significantly stronger during the lowering phase than the lifting phase. We will use this fact to our advantage.
To perform a negative pull-up, place a box or bench under the bar. Jump to the top position of the pull-up – chin over the bar, chest up. Now, begin to lower yourself down as slowly and controlled as possible. Aim for the descent to take between 5 and 8 seconds. When you reach fully extended arms, step back onto the box and repeat. Do not try to pull yourself back up.
Programming is key here. Instead of going to failure, focus on quality. Do 4-5 sets of 3-5 negative reps. Rest at least 120 seconds between sets to allow your nervous system to recover. Initially, you might feel like you "fall" through the bottom of the movement – this is normal. Fight to control every inch. When you can perform 5 sets of 5 negative reps with a duration of 5+ seconds each, you are very close to your first clean pull-up.
🔬 From Practice
I worked with a client, Maria, 34, who had been unsuccessfully trying to do her first pull-up for months. Her program mainly included lat pulldowns and endless jump-assisted pull-up attempts. We replaced this with a twice-weekly focus. On Day 1, we did 5 sets of 4 negative pull-ups (aiming for a 6-second descent). On Day 2, we did 4 sets of 10 inverted rows and 3 sets of assisted pull-ups with a thick band for 6-8 reps. After 5 weeks of this work, without even testing it purposefully, she simply went to the bar and did one perfect, clean pull-up. The strength built from the negatives and the volume from the assisted work had transferred directly.
Phase 3: From 1 to 5+ Reps — Assistance and Volume
Congratulations, you've done your first pull-up! The euphoria is great, but now the real work begins. Doing one rep is a matter of peak strength. Doing several is a matter of strength endurance, which is built with volume. This is where assisted variations come in handy.
1. Band-Assisted Pull-ups: Bands are a great tool, but often misused. They provide the most assistance in the bottom, hardest part of the movement, and the least at the top. Choose a band that allows you to perform 3 sets of 6-10 clean reps. Don't use a band that's too thick and "shoots" you up. Focus on the same technique as a bodyweight pull-up – full range of motion, controlled descent. The goal is to accumulate quality volume that would be impossible with just your one-rep max.
2. Lat Pulldown: While not a direct replacement, the lat pulldown is an excellent accessory. It allows you to precisely control the weight and work in different rep ranges. A good guideline is to aim for pulling around 70-80% of your body weight for 8-10 reps. For example, if you weigh 80kg, aim to work with about 55-65kg on the pulldown. This will build back muscle mass that directly supports your pull-ups.
An example training day structure for this phase might look like this:
1. Pull-ups: 1 set to max clean reps (even if it's just 1). Rest 3 minutes.
2. Band-Assisted Pull-ups: 3 sets of 6-8 reps (goal: clean execution). Rest 90 seconds.
3. Lat Pulldown: 3 sets of 10-12 reps (goal: fatigue and pump). Rest 75 seconds.
Grip Difference: Pull-up vs. Chin-up
The terms "pull-up" and "chin-up" are often used interchangeably, but they describe two different movements with a different emphasis on muscle groups. Understanding these differences will allow you to use them more effectively in your program.
Pull-up (Overhand Grip): Performed with a pronated grip (palms facing away), usually slightly wider than shoulder-width. This variation places a greater emphasis on the latissimus dorsi and is harder for most people, as the biceps are in a mechanically disadvantageous position.
Chin-up (Underhand Grip): Performed with a supinated grip (palms facing towards you), usually shoulder-width apart. Here, the biceps are much more actively involved in the movement, making the exercise easier for most beginners. This is a great option to start accumulating reps and confidence. Don't consider it an "inferior" option – it's simply a different exercise.
In my opinion, it's best for beginners to start with chin-ups because they allow for faster progress and volume accumulation. Once you can do 5-6 clean chin-ups, start integrating pull-ups into your program. You can alternate them on different training days.
| Characteristic | Pull-up (Overhand Grip) | Chin-up (Underhand Grip) |
|---|---|---|
| Grip | Pronated (palms forward), wider than shoulder-width | Supinated (palms towards you), shoulder-width |
| Primary Muscles | Latissimus dorsi, lower traps | Biceps brachii, latissimus dorsi |
| Relative Difficulty | Higher | Lower |
| Recommendation | For back width emphasis, after building foundational strength | For beginners, to build biceps and back strength, for easier volume accumulation |
Programming and Progression: How to Reach 10 Reps?
Once you're doing 3-5 clean reps, the goal becomes 10. This is the time to start thinking like an athlete and structuring your workouts with a clear goal and progression. Training pull-ups 2-3 times per week is optimal. Here's a sample two-day split:
Day 1: Intensity and Strength
1. Pull-ups: Work on a "ladder" scheme. Example: 1 rep, rest 30 sec. 2 reps, rest 45 sec. 3 reps, rest 60 sec. Continue until you cannot complete the next rung cleanly. This is one ladder. Do 2-3 such ladders with 3 minutes rest between them.
2. Heavy Negative Pull-ups: 3 sets of 3 reps, aiming for a maximally slow descent (8-10 seconds).
Day 2: Volume and Hypertrophy (3 days after Day 1)
1. Pull-ups: Perform max reps on the first set. Then do 4 more sets, aiming for a total of 25-30 reps across all 5 sets. Example: 6, 5, 5, 4, 4. Don't worry if the count drops.
2. Band-Assisted Pull-ups / Lat Pulldown: 3-4 sets of 8-12 reps to add more quality volume and stimulate hypertrophy in the back muscles.
The key is progressive overload. Each week, try to add one rep to your total volume (e.g., 26 reps instead of 25 on Day 2) or complete the ladder one rung higher. Don't test your max every workout. Do it once every 4-6 weeks. Progress will not be linear – there will be weeks where you feel weaker. This is normal. Stick to the plan.
⚠️ Common Mistakes
- Incomplete Range of Motion: Stopping before your chin is over the bar, or not lowering to fully extended arms, "steals" from the exercise's effectiveness. Every rep must be complete.
- Using Momentum (Kipping): Swinging your body to "throw" yourself up is a CrossFit technique for speed, not for building raw strength. Learn to do strict pull-ups first.
- Overly Fast Negative Phases: The controlled descent is just as important as the pull. "Falling" down removes half the stimulus for muscle growth.
- Neglecting Horizontal Pulls: A strong back is built with balance. Don't stop doing inverted rows or barbell/dumbbell rows. They support pull-up strength.
Should I do pull-ups if I'm a woman? Absolutely!
The myth that women can't do pull-ups is completely false. Although, on average, women have less upper body muscle mass, there's no physiological reason they cannot achieve this movement. The process is the same – building a foundation, negative reps, and strategic use of assistance. Some of my most impressive clients in terms of pull-ups are women.
What should I do if I feel elbow pain?
Elbow pain, often called "golfer's or tennis elbow," is common with pull-ups, especially with an underhand grip (chin-up). This can be a sign of overuse or poor technique. Try using a neutral grip (palms facing each other) or widening your grip slightly. Reduce volume temporarily and focus on forearm strengthening exercises (like wrist curls). If the pain persists, consult a physical therapist.
When should I start adding weight to pull-ups?
Don't rush it. Adding weight is an advanced tool. My rule is: don't think about weight until you can perform at least 10-12 perfect, clean bodyweight reps. When you reach that stage, start small – 2.5kg or 5kg added via a belt, and return to lower reps (5-8), again focusing on perfect technique.
How often should I test my max rep count?
Not every workout. Testing your max is very taxing on the nervous system and can hinder your subsequent training sessions. Stick to your structured program and test your max rep count once every 4-6 weeks. This is enough time to accumulate real progress and get an objective measure of where you stand.
See more in the fitness guides at Sport Zona Academy.
🔬 Expert Note from Sport Zona
For many years, I've observed that most trainees underestimate the negative phase of pull-ups, as well as the isometric hold at the top position. These two components are essential for building pure strength and stability. Don't rush to move on to reps until you master control during the descent – this is one of the most common omissions I see.
See more in the fitness guides at Sport Zona Academy.
Recommended products


Frequently asked questions
What are the foundational exercises for building strength before your first pull-up?
To build a foundation before your first pull-up, focus on active hangs for grip strength, scapular pull-ups for proper movement technique, and inverted rows for improving horizontal pulling.
What is the role of negative pull-ups and scapular pull-ups?
Negative pull-ups (controlled lowering) and scapular pull-ups (shoulder blade activation) are key to building the fundamental strength and muscle control needed before you can perform a full pull-up.
How should I use assisted variations like bands or a machine?
Assisted variations should be used strategically to increase training volume and improve technique, rather than as the primary means of completing the movement.
How often should I train pull-ups to see progress?
For optimal progress, train pull-ups 2-3 times per week, alternating focus between strength, volume, and technique, and be patient as progress is a process.