Bench press (Bench press) — teknik, yaygın hatalar
kemer, skapular retraksiyon, bacak itme, bar rotası, ilerleme için programlama
The correct bench press technique is fundamental for maximum strength and muscle growth, while minimizing the risk of injuries to the shoulders, elbows, and wrists.
📌 3 Key Takeaways
- Stability is everything: Retracting the shoulder blades and driving with the feet create a platform from which to push safely and powerfully.
- The arch is not cheating: A proper, moderate arch shortens the bar path, protects the shoulders, and allows you to use more weight effectively.
- The bar path matters: The movement is not a straight line, but a slight curve (J-shape) from the lower chest to a position over the shoulder joint.
The Setup: The Foundation of Every Good Rep
💬 Simply put: To perform the bench press correctly and safely, the most important thing is to assume a stable and tight position before lifting the weight, as if you were a launchpad ready for takeoff.
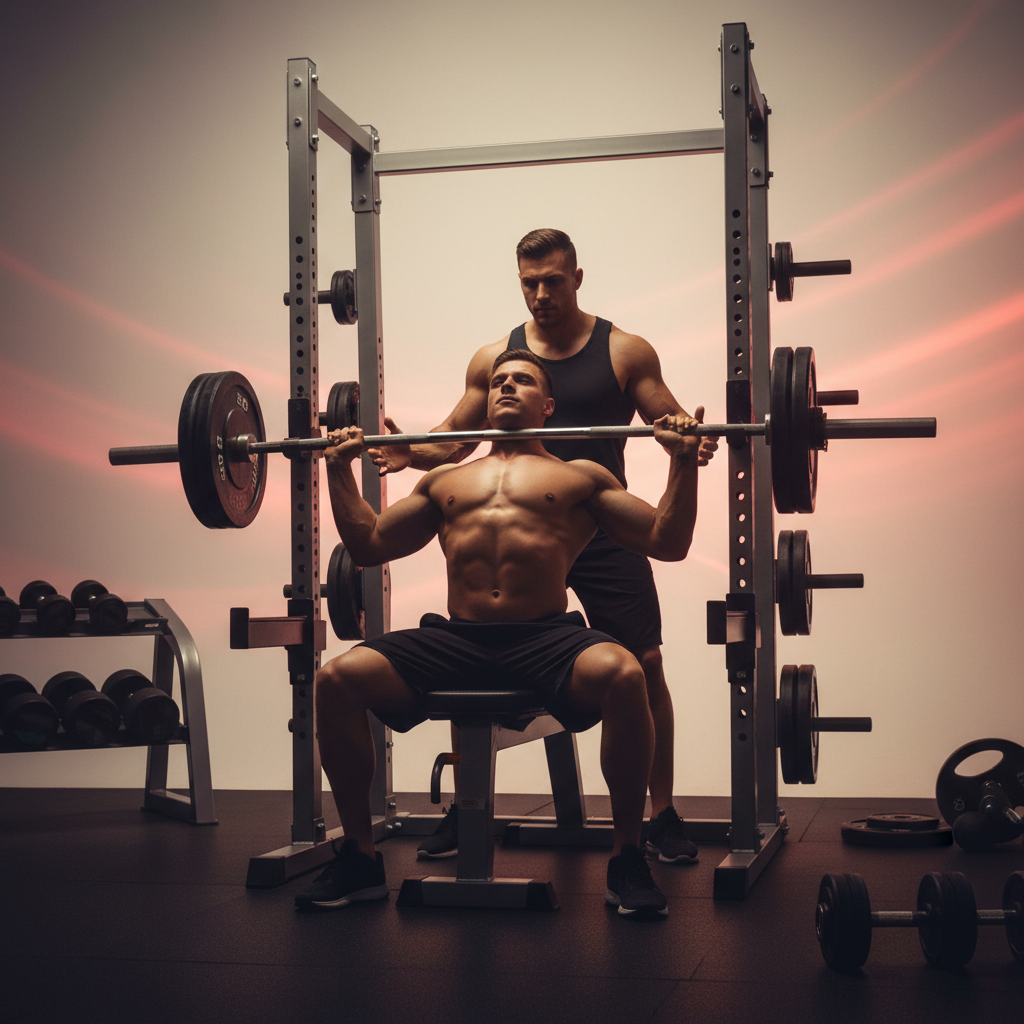
Every successful bench press starts long before the bar leaves the rack. The setup is 90% of the battle. The goal is to create the most stable and tight body position possible. Think of yourself as a launchpad. The stronger the base, the more force you can generate. Start with the five points of contact: both feet should be firmly on the floor, the glutes, the upper back (traps and shoulders), and the head should be in contact with the bench. Lifting the glutes during the movement turns the exercise into an incline press and is a major fault that often leads to disqualification in powerlifting competitions.
Position yourself on the bench so that your eyes are directly under the bar. This gives you the best angle to unrack the bar without losing your shoulder position. Your grip should be slightly wider than shoulder-width – a good starting point is to have your index fingers on the outer edge of the knurling rings. Too wide a grip strains the shoulders, while too narrow a grip shifts much of the work to the triceps and front deltoids. Grip the bar tightly, as if you want to break it. This activates the forearm muscles and improves wrist stability. Your thumb must wrap around the bar (do not use a "suicide grip"), and your wrist should be in a neutral position, almost straight, not bent backward.
Scapular Retraction and Depression: Your Shoulders' Armor
This is perhaps the most important, yet most overlooked, aspect of bench press technique. Before unracking the bar, you need to pull your shoulder blades together (retraction) and down towards your hips (depression). Imagine trying to pinch a pencil between them. This position creates a stable base for the shoulder joint, placing it in an optimal and safe position. When the shoulders are "loose" and move forward during the press, it creates immense stress on the rotator cuff and tendons, which is a recipe for chronic pain and injury.
I often see people just lie down on the bench and start pressing, with their shoulders shooting forward on every rep. This is dangerous and, on top of that, it steals your strength. When the scapulae are locked back and down, you are pushing from a stable muscular "cushion" created by the traps and rhomboids. This allows the chest and triceps to generate maximum force. To practice this, lie on the floor without weight and try to lift your chest towards the ceiling by squeezing your shoulder blades together. You should feel your upper back tighten. Transfer that same feeling to the bench press.
🔬 From Practice
I worked with a client named Ivaylo, 34, who had been stuck at 90 kg for 1-2 reps for months and complained of pain in the front of his shoulder. After analyzing his technique, I saw the classic problem: no scapular retraction and "flared out" elbows. For two weeks, we focused solely on the setup. We reduced the weight to 60 kg and worked on consciously retracting and depressing the shoulder blades before each set. We added exercises to activate the rhomboids and middle traps. The result? After six weeks, Ivaylo was hitting 95 kg for 5 perfect reps, and the shoulder pain had completely disappeared. Sometimes taking a step back in weight is two steps forward in progress.
The Arch: Myth and Reality
The arch in the bench press is a subject of endless debate, with many people condemning it as "cheating." The truth is that a functional arch is a key element of proper technique, especially for strength athletes. Its purpose is not to drastically shorten the range of motion, but to aid scapular depression and place the chest in a more advantageous mechanical position. When the spine is slightly arched, it is much easier to keep the shoulder blades retracted and depressed, which, as we've already established, is critical for shoulder health.
The difference is in the degree. The extreme arch you see in elite powerlifters requires specific flexibility and is neither necessary nor recommended for the general fitness enthusiast. For most people, the goal is to have enough space to slide a hand between the lower back and the bench. The arch should come from the thoracic spine, not the lumbar spine. The glutes must remain firmly on the bench at all times. Think of the arch not as a "bridge," but as a way to "puff out" your chest towards the bar.
Leg Drive: The Bench Press's Secret Engine
Many beginners and intermediates view the bench press as an upper-body-only movement. This is a huge mistake. Leg drive is the technique by which you generate full-body tension and transfer it through your torso to the bar. This doesn't mean kicking your legs or pushing so hard that your glutes lift off the bench. It means using your legs as an anchor and a source of stability and initial force.
To perform it correctly, plant your feet firmly on the floor with your entire foot, not just your toes. Foot placement can vary – some prefer them further back under the hips, others wider. Experiment to find the most stable position for you. As you lower the bar, mentally "wind up" your legs, trying to push the floor forward (as if you want to slide your head back on the bench). Just before you start pressing the bar up, initiate the movement with a powerful but controlled push of your feet into the floor. You'll feel this force transfer through your tight glutes and back, helping the bar to unrack from your chest. Proper leg drive can add 5-10% to your max bench press almost immediately.
⚠️ Common Mistakes
- Elbows at 90 degrees: Flaring the elbows out to the sides (so-called "winging") puts the shoulder joint in internal rotation and under significant stress. Keep your elbows tucked at an angle of about 45-75 degrees relative to your torso.
- Bouncing off the chest: Using momentum by "bouncing" the bar off the chest. This removes tension from the muscles during the hardest part of the movement, which is also... risky for the sternum. Control the eccentric (lowering) phase and pause briefly on the chest.
- "Guillotine" press: Lowering the bar too high, towards the collarbone or neck, is extremely dangerous and puts immense stress on the shoulders. Aim for the lower part of the chest, just below the nipple line.
- Unstable wrists: Allowing the wrists to bend backward under the weight of the bar creates huge pressure on the joint and can lead to pain and injury. Keep the wrist straight, in line with the forearm.
Bar Path and Breathing: The Fine Details
The optimal bar path in the bench press is not a straight vertical line. Due to the mechanics of the shoulder joint, the most efficient and safest path is a slight J-curve. On the descent (eccentric phase), the bar moves down and slightly forward, touching the lower chest. On the ascent (concentric phase), the bar moves up and slightly back, finishing in a position directly over the shoulder joints, not over the chest. This trajectory allows for better engagement of the chest muscles and keeps the shoulders in a safer position.
Breathing is equally important for maintaining intra-abdominal pressure and stability. Before unracking the bar, take a deep breath into your belly (not your chest) and hold it. This is the so-called Valsalva maneuver, which increases intra-abdominal and intra-thoracic pressure, stabilizing the torso. Hold your breath during the descent and the initial part of the ascent. Exhale powerfully only after you've passed the sticking point (the hardest part of the movement) or as you lock out your elbows. For higher rep sets (8+), you can exhale on each press and inhale on the descent, but for heavy sets under 5 reps, holding your breath is essential for maximum stability.
Programming for Progress: Beyond 3x10
Doing the same sets and reps week after week is a sure path to stagnation. To progress on the bench press, you need a structured plan based on the principle of progressive overload. This means systematically increasing the stimulus you apply to your muscles. This can be done by increasing the weight, the number of reps with the same weight, the number of sets, or by decreasing rest times.
For an athlete aiming for both strength and hypertrophy, a good strategy is to combine different rep ranges. For example, start your chest workout with a heavy bench press in the 4-6 rep range to stimulate strength adaptation. Then move on to accessory exercises like incline dumbbell presses or dips in the 8-12 rep range for more volume and hypertrophy. Finally, you can finish with isolation movements like dumbbell flyes or crossovers for 12-15 reps to induce metabolic stress. Varying the stimulus is key to long-term growth.
| Week | Main Bench Press | Accessory 1: Incline Dumbbell Press | Accessory 2: Dips (Weighted) |
|---|---|---|---|
| 1 | 4 sets x 6 reps @ 80% of 1RM | 3 sets x 8 reps | 3 sets x to failure |
| 2 | 4 sets x 5 reps @ 82.5% of 1RM | 3 sets x 10 reps (same weight) | 3 sets x to failure (try to add +1-2 reps) |
| 3 | 4 sets x 4 reps @ 85% of 1RM | 3 sets x 12 reps (same weight) | 3 sets x to failure (add 2.5 kg weight) |
| 4 (Deload) | 3 sets x 5 reps @ 65% of 1RM | 2 sets x 10 reps (with lighter dumbbells) | 2 sets x 8 reps (bodyweight) |
- How often should I bench press?
- For most people, training the bench press 1 to 2 times per week is optimal. Advanced athletes can benefit from 3 sessions, but this requires careful management of volume and intensity to avoid overtraining, especially of the shoulder girdle.
- Is the Smith machine bench press a good substitute?
- No. The Smith machine locks the movement in an unnatural straight line and removes the need for stabilizing muscles. This can create bad movement patterns and strain the joints. Use it only if you have no alternative or for specific purposes, but the free barbell is always the better choice.
- Isn't the arch "cheating" and bad for the back?
- No, a moderate, functional arch is part of proper technique. It protects the shoulders and puts the body in a stronger position. It becomes dangerous when it's too pronounced and comes from the lower back instead of the thoracic spine, and when the glutes lift off the bench.
- What should I do if my wrists hurt?
- First, check your grip and wrist position – it should be straight, not bent backward. Ensure the bar rests low in your palm, close to the base of your thumb. Using wrist wraps can provide additional support, especially on heavy sets.
- Is barbell or dumbbell bench press better?
- Both have their advantages. The barbell allows you to lift more weight and is better for developing maximal strength. Dumbbells allow for a greater range of motion, engage more stabilizing muscles, and help even out strength imbalances between the left and right sides. It's best to include both in your program.
See more in the fitness guides of Sport Zona Academy.
🔬 Expert Note from Sport Zona
From my practice, I notice that many athletes underestimate the setup phase. They often rush into lying down and grabbing the bar without taking a few seconds to position themselves. A stable start can add an unexpected amount of weight to your working set, or prevent a serious injury.
See more in the fitness guides of Sport Zona Academy.
Önerilen ürünler


Sıkça sorulan sorular
Bench press'te skapulanın retraksiyonu ve depresyonunun rolü nedir?
Skapulanın retraksiyonu ve depresyonu, omuz eklemi için stabil bir temel oluşturarak yaralanma riskini en aza indirir. Bu pozisyon, göğüs kaslarının ve tricepslerin maksimum güç üretmesini sağlar.
Bench press'te köprünün (arkın) önemi nedir?
Orta dereceli bir köprü (ark), kaldıracın kat etmesi gereken mesafeyi kısaltarak daha fazla ağırlık kullanılmasını sağlar. Ayrıca omuz eklemlerini korur.
Bench press'te kaldıraç yolu nasıl olmalıdır?
Kaldıraç yolu düz bir çizgi değil, hafif bir eğridir (J şeklinde). Yüzün doğrudan üzerinden değil, omuz ekleminin üzerindeki bir pozisyona doğru göğsün alt kısmından hareket eder.
Bench press kurulumunda yapılan temel hatalar nelerdir?
Temel hatalar arasında kalçanın bench'ten ayrılması, çok geniş veya çok dar tutuş ve skapulanın retraksiyonu ile depresyonunun olmaması yer alır. Doğru kurulum, etkinlik ve güvenlik için kritik öneme sahiptir.